When we place a skillet over a flame or an electric element, we are setting up a deliberate thermal transfer between fuel, vessel, and muscle tissue. Searing is not simply a matter of scorching the exterior of a steak or an autumn squash to make it look cooked. It is a calculated manipulation of surface moisture, contact pressure, and stored energy designed to produce an even crust while leaving behind a rich bed of fond: the concentrated, browned meat and vegetable sugars bonded to the cooking floor.
Managing this process requires us to look past the knob on the stove dial. The burner does not heat the food directly; it charges a reservoir of metal that then yields its stored thermal mass to cold ingredients. If that reservoir is too shallow, the metal chills instantly, moisture pools, and the food boils in its own juices. If it is too hot, delicate amino acids carbonize into bitter black ash before a sauce base can form. Here is how we balance heat retention, surface diagnostics, and pan construction to control the sear from start to finish.
The Physics of Metal Mass and Thermal Retention
Every pan in our rack operates on two physical principles: thermal conductivity and volumetric heat capacity. Conductivity measures how quickly heat travels from the burner through the base and up the sidewalls. Volumetric heat capacity dictates how many joules of energy the vessel can store at a given temperature before releasing it into the food. Cast iron, for instance, is a mediocre conductor of heat compared to copper or aluminum, yet its sheer density and wall thickness make it an exceptional energy bank.
When cold protein makes contact with hot metal, the pan loses heat rapidly to the colder mass. A thin, stamped stainless steel pan measuring 1.5 millimeters thick might heat up in ninety seconds, but it possesses negligible stored energy. The cold meat pulls the surface temperature down below the threshold needed for crisping, and because the metal cannot replenish heat faster than the meat absorbs it, water leaks out across the surface. A five-millimeter-thick cast iron skillet or a 2.5-millimeter copper pan lined with stainless steel resists that sharp drop, holding enough reserve calories to flash-vaporize water instantly upon contact.
| Material | Conductivity (W/m-K) | Volumetric Heat Capacity (J/cm³-K) | Practical Preheating Behavior |
|---|---|---|---|
| Cast Iron | 52 | 3.8 | Slow to saturate; creates localized hot zones if not given eight to ten minutes over low heat. |
| Carbon Steel | 54 | 3.9 | Behaves like cast iron but thinned slightly; responds five minutes faster to flame adjustments. |
| Clad Stainless (Aluminum Core) | 130 to 160 | 2.7 | Even lateral spread; heats in three to four minutes; moderate thermal drop under heavy loads. |
| Heavy Copper (2.5mm) | 390 | 3.4 | Near-instant heat transmission; rapid recovery; demands careful monitoring to avoid scorch. |
We must preheat heavy vessels slowly. If we blast a cold cast iron skillet over high flame, the center directly above the burner ring will spike to 260 degrees Celsius while the outer edges remain under 120 degrees Celsius. Bringing the metal up over a medium-low flame for seven to nine minutes allows lateral conduction to work through the crystalline structure of the iron, ensuring the entire cooking floor offers an unbroken plane of steady thermal reserves.
Reading the Surface Shimmer and Water Droplet Dance
Infrared thermometers give an accurate digital reading of bare metal, but seasoned cooks learn to read the visual and physical cues the pan gives off as temperature climbs. As cooking fat is introduced, its viscosity changes under heat. Cold oil rests in heavy, rounded pools. As it reaches 150 degrees Celsius, it thins out, spreading across the base like water and forming micro-ripples or a subtle surface shimmer as hot convection currents circulate within the thin fat layer.
Before adding cooking fat, we can test dry bare stainless steel using the Leidenfrost effect. By flicking a few droplets of water from our fingertips into the dry pan, we can identify three distinct thermal zones:
- Sub-boiling to standard boiling (100 to 140 degrees Celsius): The water droplets sit flat on the surface, hiss aggressively, bubble, and boil away into steam within three seconds. The pan is far too cool to sear without sticking.
- The Leidenfrost zone (160 to 215 degrees Celsius): A drop of water does not evaporate immediately. Instead, its bottom layer vaporizes instantly, forming an insulating vapor cushion beneath the droplet. The water gathers into a single frictionless sphere that glides silently across the metal floor like a glass bead. This is the prime entry window for stainless steel searing.
- Overheated dry metal (above 230 degrees Celsius): The droplet fractures violently into dozens of microscopic beads that scatter and vanish in less than a second. Searing at this temperature will break down fat past its smoke point and burn food on contact.
Once the Leidenfrost threshold confirms the temperature of a dry stainless pan, we wipe away the bead, add oil with a high smoke point, such as clarified butter, lard, or refined avocado oil, and wait three to five seconds until the oil shimmers before laying down our cut.
Preventing the Temperature Crash When Food Hits Pan
The greatest enemy of an even crust is excess water. Water possesses an enormous latent heat of vaporization: it requires roughly 2,260 joules of energy simply to convert one single gram of liquid water at boiling point into steam. If a piece of meat enters the pan wet, the metal transfers all its stored calories into boiling surface moisture rather than browning the protein fibers.
To eliminate this crash, we begin long before the pan meets the burner. We pat the meat thoroughly dry with coarse paper towels, or better, set it uncovered on a wire rack inside a refrigerator for six to twelve hours. The moving, dehumidified air inside the refrigeration unit draws out surface humidity, creating a taut, dry skin or pellicle that begins browning the second it touches hot fat.
Managing pan crowding is just as critical. We avoid loading more than two-thirds of the cooking surface at once. If we drop three cold chicken thighs into an eight-inch skillet, the meat cools the floor below 100 degrees Celsius, steam cannot vent past the tight clearances between pieces, and condensation drips back into the oil. Leaving clear avenues of bare, hot metal between the pieces lets steam vent freely into the room, preserving pan temperature and crisping the food.
The Maillard Reaction Versus Destructive Charring
The chemistry of a good sear resides in the Maillard reaction, an intricate cascade of chemical changes between reducing sugars and amino acids that occurs between 140 and 165 degrees Celsius. This window yields complex, savory flavor compounds: pyrazines that taste roasted, furans that taste nutty, and thiophenes that contribute rich meatiness. Below 140 degrees Celsius, the reaction stalls; above 180 degrees Celsius, we enter pyrolysis, where organic material decomposes directly into carbon.
Controlling this boundary is a tactile exercise. When protein first hits the pan, its raw muscle fibers grab onto microscopic pores and tool marks in the metal. If we try to lift or push the meat during the first ninety seconds, it will tear and shred against the steel. We leave it undisturbed. As heat dehydrates the outer cells and initiates the Maillard reaction, the proteins firm up, contract, and naturally release their mechanical hold on the metal.
When the meat releases freely, we flip it and drop the burner output slightly. The first side absorbed the impact of the highest surface temperature; the second side requires a gentler, steadier heat to finish cooking through without turning the fond already developing on the bottom of the pan into dry black flakes.
Building Pan Sauces from Browned Fond
The particles left behind on the pan base after the meat is removed are not scorched debris; they are concentrated fond, the golden-amber foundation of a pan sauce. A pristine fond should range in color from hazelnut to deep mahogany. If the fond turns gray, the pan was too cold and the meat steamed. If it is matte black and smells acrid, the pan grew too hot, and that residue must be discarded because its bitterness will ruin a sauce.
To capture these browned flavors, we follow a precise sequence once the meat rests on a cutting board:
- Pour off excess fat: Tip the skillet to collect and pour off the clear rendered fat into a heatproof bowl, leaving behind a thin film of oil and the adhering fond particles.
- Aromatize: Return the pan to low flame. Add minced shallots or crushed garlic. The water in the fresh aromatics softens the crust slightly while their natural moisture starts sweating out, absorbing flavor from the floor.
- Deglaze with cold liquid: Pour in four to six tablespoons of wine, dry cider, stock, or verjus. Thermal shock aids the release: the cold liquid against the hot pan creates vigorous steam bubbles that lift the fond from the metal.
- Scrape the bottom: Work a flat-edged wooden spatula across the metal floor, lifting every speck of browned crust into the simmering liquid.
- Reduce and mount: Simmer the liquid down until it coats the back of a spoon, drop the heat to the lowest setting, and swirl in two tablespoons of chilled, cubed butter to emulsify the sauce into a smooth glaze.
Matching Heat Source to Metal Composition
Heat transfer behaves differently depending on the fuel beneath the skillet. Gas burners generate convective heat plumes that wrap around the bottom curvature and rise up the exterior sidewalls. Electric coil and ceramic-glass radiant tops transfer heat through direct contact and infrared radiation, creating a concentrated horizontal ring. Induction stoves use high-frequency electromagnetic fields to generate eddy currents directly within the iron layers of the cookware itself, turning the metal into its own heating element.
Understanding these dynamics allows us to match our pans to our heat source effectively:
- Gas burners with heavy cast iron or carbon steel: Gas flame rings can cause severe hot spots on thin metals. Heavy iron absorbs the uneven fingers of flame and balances them through its thick cross-section, though we keep the flame within the footprint of the pan base to prevent scorching handle joints.
- Ceramic-glass radiant cooktops with multi-ply clad stainless: Radiant elements demand completely flat bottoms to ensure continuous physical contact. Multi-ply pans layered with internal aluminum cores transfer heat laterally across the flat base, preventing the thermal bridging common on radiant glass.
- Induction with carbon steel or layered cookware: Induction creates immediate, intense localized heat directly in the ferromagnetic metal. Because induction can heat an empty pan to 260 degrees Celsius in forty seconds, we must warm cookware at low settings first to prevent warping the base plate.
Common Mistakes
The most frequent error we encounter is using excessive oil during the initial sear. Adding more than a thin, unbroken film of oil insulates the meat from direct contact with the pan floor, effectively deep-frying or poaching the exterior rather than searing it. This inhibits the formation of fond, as browned proteins disperse into the oil volume rather than adhering to the pan base.
Another widespread misstep is rushing the heat adjustment when turning proteins. Cooks often leave the flame running at maximum output throughout the entire process. Once the pan is charged with heat and the meat is flipped, that trapped energy has nowhere to go because the moisture barrier on the hot side is gone. Lower the flame just before flipping to keep the crust crisp without burning the fond beneath.
Practical Next Steps
To master stovetop heat control in your own kitchen, start with an empty, ungreased stainless steel skillet. Practice the water droplet test with five or six drops flicked from your fingers over four minutes on medium heat, noting the precise moment the metal transitions from bubbling evaporation to frictionless sliding.
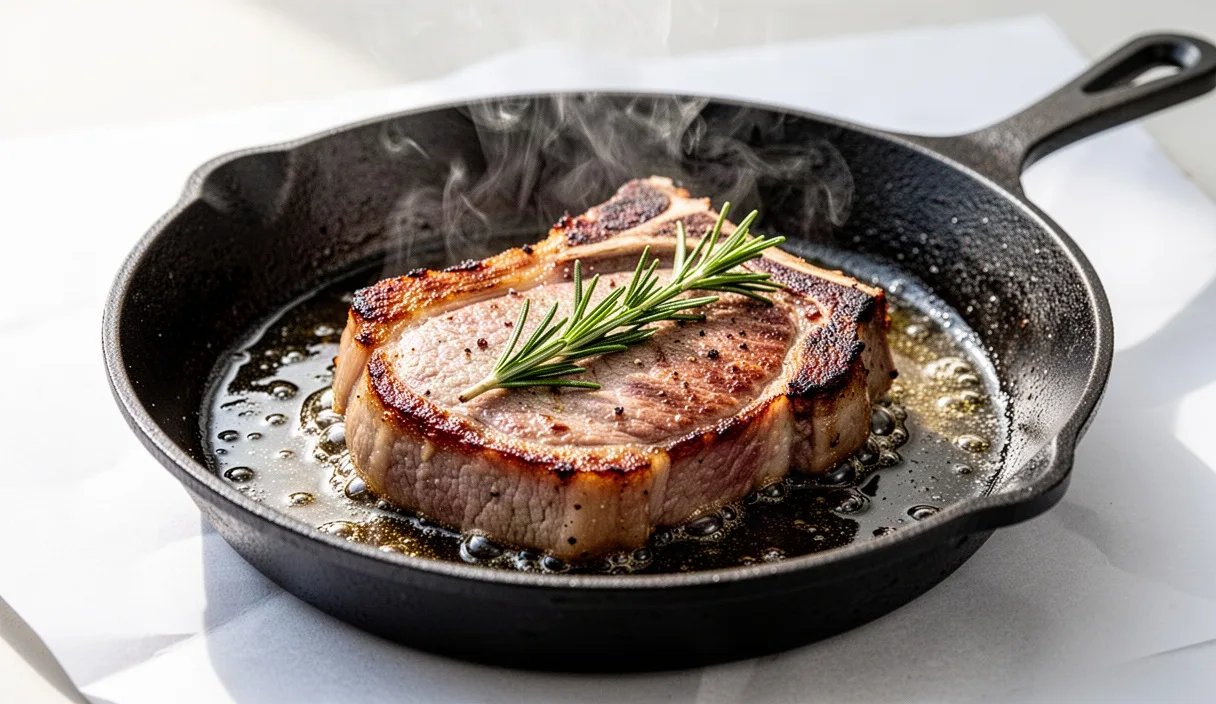
Next, practice with a pair of thick bone-in pork chops or firm root vegetables like parsnips. Salt them well in advance, dry their exteriors completely, and sear them in a preheated cast iron or heavy steel skillet using just enough fat to glaze the surface. Keep the spacing wide, let the ingredients release from the pan naturally without forcing them with tongs, and inspect the fond that remains. Once your fond shows a clean mahogany hue, deglaze the skillet with a splash of broth or wine to build muscle memory for pan sauces that turn every sear into a finished dish.