When we bring a crate of cultured butter into the kitchen during the cooler months, our first thought is often of the larder. Raw or churned sweet cream butter carries water and fragile milk proteins that spoil quickly at room temperature. By breaking butter down into its constituent elements through patient heating, we strip away the moisture that invites mold, separate out the proteins, and collect pure, shelf-stable butterfat. It is one of the oldest preservation practices in the dairy room, relying on sensory observation rather than complex machinery.
The transformation demands nothing more than a heavy pot, a piece of tightly woven cloth, and close attention to sound and aroma. As water leaves the pan in steady plumes of steam, the quiet spluttering gives way to a clean, rhythmic hiss, and the pale butterfat clarifies into clear liquid gold. Whether we pull the pan from the flame early to preserve the clean, sweet richness of basic clarified butter, or allow the settled milk solids to caramelize into traditional ghee, the process anchors us to the stove and rewards an afternoon of patient, deliberate craft.
Differences Between Clarified Butter and Traditional Ghee
While many home cooks treat clarified butter and ghee as interchangeable terms, they represent two distinct points along the same thermal spectrum. Standard commercial butter in North America and Europe typically contains roughly 80 to 84 percent butterfat, 16 to 18 percent water, and one to two percent milk solids consisting of lactose and casein. The work of clarifying simply extracts the water and discards the milk proteins, leaving behind pure fat with an exceptionally high smoke point and a neutral, sweet profile.
Traditional ghee, which has its origins in ancient South Asian food traditions, carries the thermal process a step further. We do not skim and discard the milk solids immediately upon separation. Instead, we let them sink to the floor of the kettle, where direct heat gently fries them in the clarified fat. This prolonged contact produces a Maillard reaction, yielding nutty aromatic compounds such as lactones and aldehydes. The clarified oil absorbs these flavors, shifting in hue from lemon-yellow to deep bronze, and picking up notes of toasted hazelnut, browned milk, and shortbread.
| Characteristic | Clarified Butter | Traditional Ghee |
|---|---|---|
| Thermal Endpoint | Water evaporation complete; solids remain pale (approx. 215-225 degrees Fahrenheit). | Solids allowed to brown at pan base (approx. 245-260 degrees Fahrenheit). |
| Aroma Profile | Sweet, milky, clean, neutral cream flavor. | Nutty, toasted, caramelized, rich caramel notes. |
| Visual Clarity and Color | Pale, bright yellow; water-white when hot, creamy yellow when set. | Amber gold when hot; textured, granular pale gold when solid. |
| Smoke Point | Approximately 450 degrees Fahrenheit. | Up to 485 degrees Fahrenheit. |
| Larder Stability | Stable for several months; benefits from cool storage. | Highly stable; keeps at room temperature for over a year due to low moisture. |
The distinction matters in the kitchen. We turn to clarified butter when we want a high-heat cooking medium that will not scorch, yet will not impose a strong flavor of its own over tender fish or light vegetables. We bottle ghee when we want an assertive, aromatic fat that lends depth to simmered lentils, roasted roots, cast-iron searing, and whole-grain breads.
Melting Butter at a Low, Measured Simmer
The work begins with selecting the right butter and the proper vessel. We prefer unsalted butter made from cultured cream, as the slight acidity lends complexity to the finished fat, and the absence of salt prevents the pan solids from scorching prematurely. Salt also acts as an emulsifier in warm fat, which makes crisp separation and clean straining much harder to achieve. For our cooking vessel, we avoid thin-bottomed pans that create hot spots. A heavy, enameled cast-iron Dutch oven or a three-ply stainless steel saucier distributes heat evenly across the base, giving us control over the resting milk solids.
We cut the butter into uniform blocks of roughly two inches each. Dropping cold butter as a single massive block into a pan forces you to crank the flame, which burns the bottom before the top melts. With smaller, uniform cubes, the butter melts into an even liquid pool over medium-low heat without sizzling.
Once the butter melts completely, we lower the burner flame until the liquid sits at a lazy, measured simmer. The surface should show steady movement without aggressive violent boiling. At this point, the butter separates into three layers: a thin, frothy white foam on top, a thick translucent layer of molten butterfat in the middle, and a heavy, watery suspension of white milk proteins sinking toward the bottom. Do not stir the pot during this period. Agitating the pan remixes the layers that physics is trying to set apart.
Observing the Three Stages of Foaming
Clarifying fat relies entirely on listening and watching. The mixture moves through three distinct visual and acoustic stages as the water boils off and the fat clarifies:
- The First Foam (Moisture Release): Within ten minutes of reaching a simmer, a thick, pillowy white crust rises to the top. The bubbles are large, irregular, and watery. The pan makes a loud, snapping, sputtering sound. This acoustic signature is the sound of water boiling out of the fat at 212 degrees Fahrenheit and bursting through the surface crust. We leave this foam alone; it will naturally thin out as the moisture escapes.
- The Clear Window (Clarification): As the water content drops below five percent, the loud crackling dies down into a quiet, fine simmer. The thick top foam breaks apart into small, dry, curd-like islands that float on the surface, while the bulk of the white solids settle quietly to the base of the pot. The center of the pot becomes transparent, allowing us to see straight through the golden liquid to the floor of the pan. If making standard clarified butter, this is where we cut the heat.
- The Second Foam (Toasting and Moisture Zero): If our goal is ghee, we let the pot simmer past the clear stage. As the temperature of the oil climbs past 240 degrees Fahrenheit, the water is entirely gone. Suddenly, a second layer of foam rises from the bottom. Unlike the coarse, wet bubbles of the first stage, this foam consists of tiny, dense, uniform micro-bubbles resembling the head on a poured stout. The pot falls almost completely silent, accompanied by a sudden release of nutty, toffee aromas.
When the second foam appears, our hands stay on the pan handles. The boundary between beautifully toasted solids and acrid, burnt carbon is measured in seconds. If the pot remains on the flame even one minute too long at this stage, the bitter flavor of scorched protein will permeate the entire batch of fat.
Toasting the Sedimentary Milk Solids
For ghee, the magic happens on the steel or enamel floor beneath the clear oil. As the remaining solids sit in direct contact with the base of the pan, the lactose sugars and amino acids undergo non-enzymatic browning. We tilt the pot gently to catch a glimpse of the bottom sediment through the foam.
The solids transition through several distinct shades. They shift first from stark white to a pale straw color, then to a warm biscuit shade, and finally to the color of roasted coffee beans or dark cinnamon. We look for a deep, reddish hazelnut tone. When roughly three-quarters of the sediment on the pan bottom reaches this autumnal shade, we immediately pull the pot off the heat source.
Residual heat in the thick floor of a cast-iron or multi-clad pan will continue cooking the solids for another three to five minutes off the flame. We set the hot pot onto a cool trivet or a cold stone surface to slow the thermal carryover. The second foam will slowly collapse, leaving a deeply aromatic, dark-honey-colored fat that is ready for the strainer.
Filtration with Unbleached Linen
Straining is the line between a clean, shelf-stable larder fat and a jar that turns moldy after a month on the counter. Standard metal mesh strainers are far too coarse, allowing fine powdered protein dust to pass through into the jar. Commercial paper coffee filters work, but their dense cellulose fibers can trap too much oil and slow the straining process to a cold crawl, causing the butterfat to solidify mid-filter.
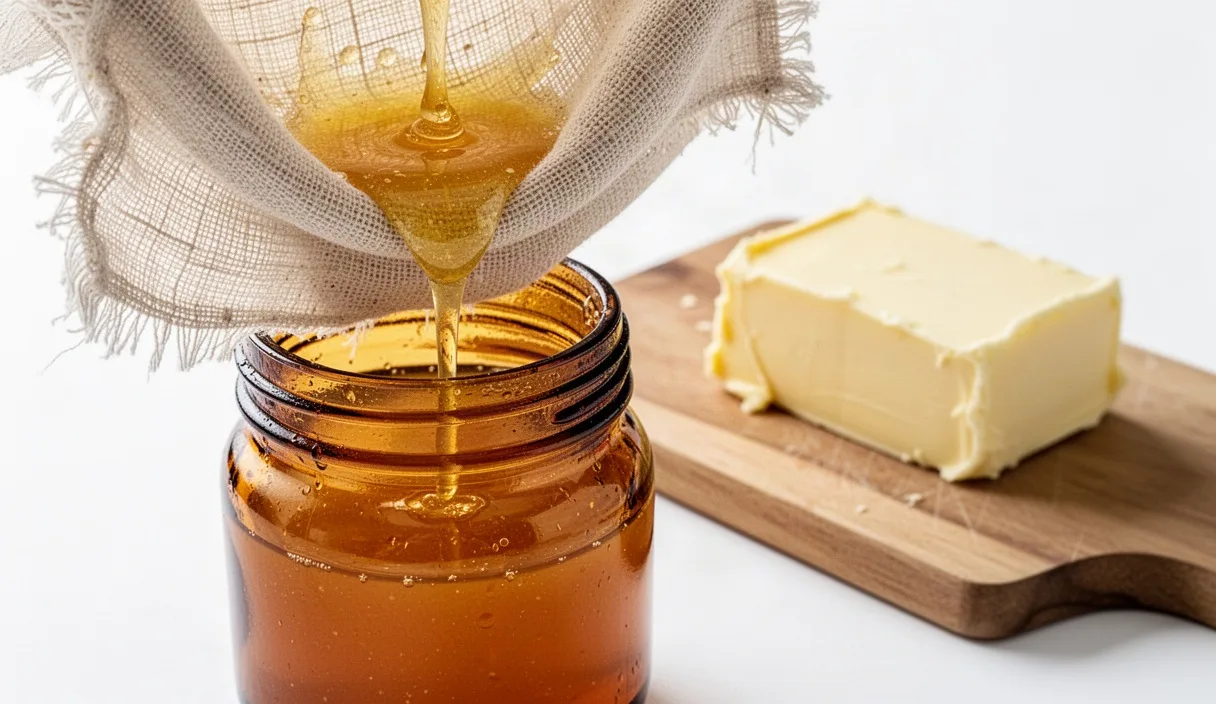
We prefer unbleached, tightly woven linen fabric or four layers of grade-90 unbleached cotton cheesecloth. Synthetic fabrics must never be used; molten butterfat at 250 degrees Fahrenheit will melt nylon and polyester fibers directly into the food. We prepare the cloth by boiling it in plain water, wringing it out completely, and drying it thoroughly. The cloth must be bone dry before it touches the fat; introducing even a few drops of water from a damp cloth into the hot ghee invites bacterial spoilage down the line.
- We fit a wide stainless-steel canning funnel into the mouth of a scalded, bone-dry glass mason jar.
- We line the funnel with our dry, pre-washed linen cloth, clipping the edges to the rim of the funnel with wooden clothespins to prevent the cloth from slipping under the weight of the pour.
- We allow the fat to settle in the pan for five minutes so the heaviest toasted solids stay clustered at the bottom.
- We slowly pour the warm fat through the center of the linen cloth, letting gravity pull the clean oil through into the jar without forcing it.
- When the sediment at the bottom of the pan slides toward the lip, we slow the stream. We allow the brown solids to collect on the cloth, but we do not squeeze the cloth with spoons or tongs. Squeezing forces bitter, microscopic protein dust through the weave, turning the final ghee cloudy and reducing its storage stability.
The spent solids remaining in the cloth can be set aside. In Indian home cooking, these browned bits are known as chhena or berri; they are prized for their intense nutty flavor and can be stirred into hot flatbread dough, sprinkled over morning oatmeal, or mixed into roasted vegetables.
Shelf Life and Storage Without Refrigeration
The purpose of rendering butter is preservation. Water is the primary driver of microbial growth, while light, heat, and oxygen trigger chemical rancidity. By boiling away all water during the second foaming stage and filtering out the protein fragments, we create a fat that can sit safely on an ambient pantry shelf for twelve to eighteen months without spoiling.
As ghee cools slowly at room temperature, it does not solidify into a smooth, waxy block like paraffin. Instead, it forms a soft, granular, crystalline structure that melts the moment it touches the tongue. This crystalline grain is a hallmark of traditional, slow-cooled ghee. If you prefer a uniform, smooth paste without grain, chill the jar rapidly in an ice bath or refrigerator after pouring, though this changes only the mouthfeel, not the preservation qualities.
To ensure your jars last without refrigeration, observe these larder storage rules:
- Jar Environment: Store the jars in a dark cupboard away from the stove, oven, or direct sun. Ultraviolet light breaks down fatty acid chains, producing a stale, cardboard-like smell over time.
- The Golden Rule of Utensils: Never dip a wet, damp, or crumb-coated spoon into the ghee jar. Even half a drop of water trapped in the jar creates a pocket where bacterial blooms or mold can thrive. Always use a thoroughly dry, clean metal or wooden spoon.
- Lid Seals: Allow the jar to cool completely to room temperature before screwing down the metal lid. If you seal a hot jar of ghee, moisture from the ambient air inside will condense on the cold underside of the lid and drip back down onto the surface of the fat, ruining your hard-won moisture barrier.
Common Mistakes
Even with careful attention, working with hot fats carries common pitfalls. Here are the issues we encounter most frequently in the dairy room:
- Rushing the Heat: Using high heat to melt the butter scorches the bottom proteins before the water can separate and evaporate. Keep the flame low; patience is your only tool here.
- Using Salted Butter: The salt concentrates as the moisture boils off, leaving the finished fat aggressively salty and causing the solids to burn onto the stainless steel at lower temperatures.
- Premature Straining: Pouring the butter while it is still cloudy and wet results in water settling beneath the fat in the storage jar. If you see water droplets at the base of your jar after cooling, the fat will spoil within weeks.
- Covering the Pan: Never put a lid on the pot during the melting or clarifying stages. Condensation will collect on the interior of the lid and drip back into the fat, defeating the evaporation process and creating dangerous hot fat splatters.
Next Steps in the Larder
Start your first project with a modest batch of four standard blocks of unsalted butter (one pound total). This yields roughly twelve to fourteen fluid ounces of pure ghee, an amount that fits neatly into a pint-sized mason jar without overwhelming your cookware or attention span.
Once you are comfortable reading the acoustic stages and aroma cues of this four-block batch, scale up to large seasonal stock runs. Ghee made from the rich, beta-carotene-laden cream of late spring and early summer pastures carries a vibrant golden hue that stores beautifully straight through the winter months. Label each jar clearly with the processing date and the source of the butter. If you suspect any jar has taken on moisture or developed off odors, discard the batch; for concerns regarding shelf-life safety protocols or foodborne pathogens, consult your local agricultural extension service.