When the first killing frost stiffens the garden soil, we bring our harvest down into the dark. Carrying wooden crates down stone cellar steps is an annual ritual of transition, moving our work from the open garden beds into the quiet masonry spaces beneath the house. The subterranean air holds a distinct smell: damp limestone, earthen floors, and the sharp, mineral tang of cold storage. Holding winter vegetables through the cold months requires an understanding of how moisture, wood, and cold air interact to keep living plant tissue dormant without allowing fungal spores to take hold.
Every vegetable entering the larder continues to respire, taking in oxygen and giving off trace amounts of moisture and heat. Our task as keepers of the cellar is not to freeze or sterilize these crops, but to slow their metabolism down to a crawl. A root pulled from the ground wants high humidity so its cellular walls remain rigid and crisp. A cured bulb of garlic or an onion demands the exact opposite, requiring dry, moving air to keep its papery tunic sealed against microbial decay. Balancing these opposing needs inside a single home cellar comes down to careful zoning, physical barriers, and the thoughtful use of natural materials.
Distinguishing Wet Storage from Dry Storage
The primary reason winter stores collapse before February is the failure to separate wet crops from dry crops. In our cellar logs, we divide the floor plan strictly into two zones based on relative humidity. Wet storage requires a relative humidity between 90 and 95 percent, paired with temperatures between 32 and 38 degrees Fahrenheit. Without this heavy moisture in the air, taproots like carrots, parsnips, and beets will lose their internal water through transpiration within three weeks, turning flexible, wrinkled, and unpalatable.
Dry storage crops, by contrast, rot rapidly in high humidity. Hard-neck garlic, yellow storage onions, and shallots need a relative humidity sitting between 60 and 70 percent, accompanied by constant air movement. If they are placed alongside damp carrots or stacked directly above an unsealed earth floor, the dormant root plates at the base of each bulb wake up. Pale white root nubs appear, moisture softens the basal plate, and fungal pathogens like black mold (Aspergillus niger) colonize the outer skins.
| Storage Zone | Vegetables | Ideal Temperature | Ideal Humidity | Storage Medium |
|---|---|---|---|---|
| Wet Cold | Carrots, Beets, Parsnips, Turnips, Celeriac | 32 to 36 degrees F | 90 to 95 percent | Damp sand, moist sawdust, or perforated tubs |
| Dry Cold | Hard-neck Garlic, Yellow Onions, Shallots | 34 to 38 degrees F | 60 to 70 percent | Hanging mesh bags, wire racks, slatted crates |
| Dry Moderate | Winter Squash, Pie Pumpkins, Sweet Potatoes | 50 to 55 degrees F | 50 to 60 percent | Open wooden shelves, untreated pine slats |
To establish these zones in a standard cold cellar or partitioned basement corner, we use vertical stratification and physical distance. The coldest, dampest air settles along the concrete or stone floor on the north side of the foundation. This is where the root boxes sit. The dry storage takes the higher ground, placed on suspended open shelves closer to ceiling vents or doorways where air exchanges occur regularly. If your space is small, a simple curtain of heavy canvas or exterior-grade wool helps baffle the humidity generated by the root sandboxes away from the hanging allium racks.
Damp Sand Packs for Carrots and Beets
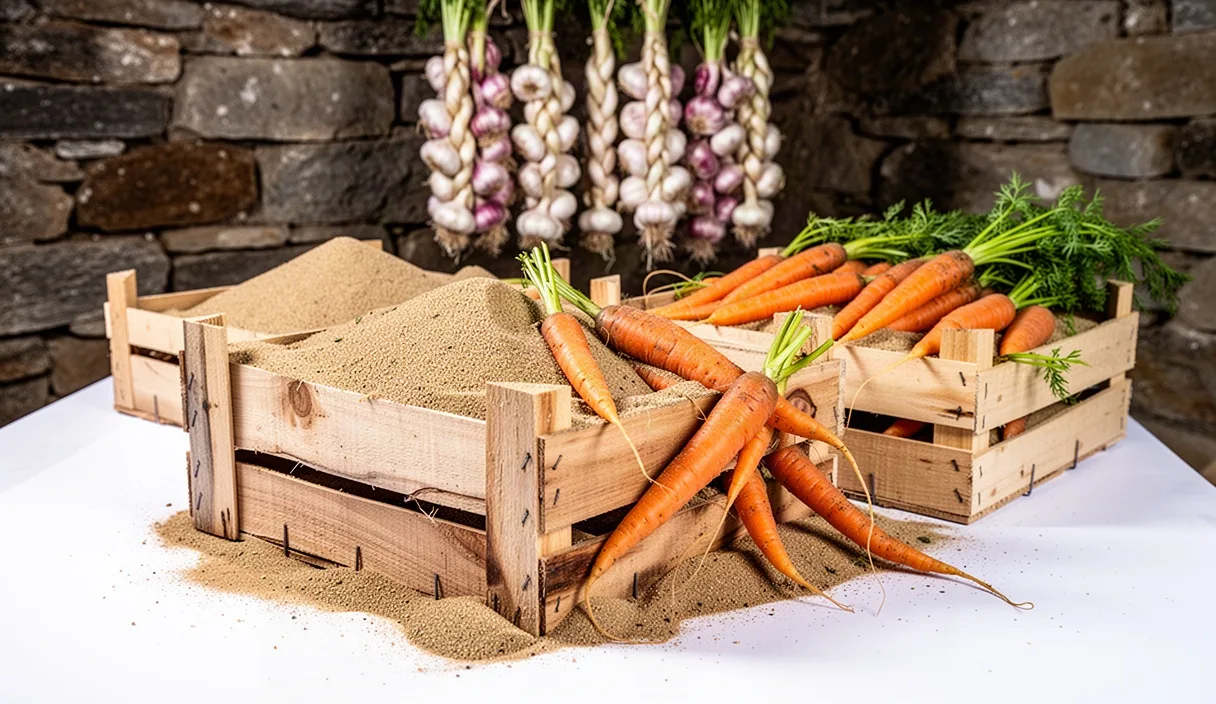
Packing taproots into damp medium mimics the protective embrace of frozen garden soil. For this task, we avoid fine mason sand, which packs down into a tight, airless slurry that suffocates roots. Instead, we source clean, coarse builder sand or washed river sand. Coarse sand drains well, holds moisture in the spaces between grains, and does not cake into hard clods when disturbed. If sand is unavailable or too heavy to haul down the stairs, untreated softwood shavings from the jointer or dry fallen oak leaves run through a shredder serve as workable alternatives, though they demand closer watching for surface mold.
We pack our roots into sturdy containers built from rough-sawn pine or cedar, though five-gallon food-grade buckets with several half-inch holes drilled through the bottom work just as well. The box must have drainage and breathing capability; airtight plastic storage totes will cause condensation to gather on the lid and drip back down onto the roots, creating pockets of anaerobic bacterial rot.
- Trimming the harvest: Cut off the vegetable greens cleanly with a sharp knife, leaving approximately a quarter inch of stem. Do not twist the tops off by hand, which tears the crown and exposes the inner flesh to rot. Brush loose dirt from the roots with a stiff-bristled horsehair brush, but do not wash them in water. The natural clay and soil film on the skin contains protective microbes that slow fungal invasion.
- Moistening the medium: Spread your coarse sand onto a clean tarp and mist it lightly with a garden hose or watering can. Mix it through with a shovel. You are aiming for a moisture level that allows the sand to hold its shape when squeezed tightly in your fist, but crumbles apart easily when touched with a finger. Water should never squeeze out between your knuckles.
- Laying the bed: Shovel a two-inch layer of the damp sand into the bottom of your storage box. Level it out with your palm.
- Arranging the roots: Place the carrots or beets onto the sand bed in a single layer, root tip pointing inward. Leave at least half an inch of clearance between each vegetable so they do not touch. If one carrot breaks down in storage, the dry sand barrier prevents the rot from migrating directly to its neighbor.
- Covering and repeating: Pour sand gently over the vegetables until they are buried by an inch of material. Lay down your next course of roots in the same spaced pattern. Continue building layers until you are three inches below the rim of the container, finishing with a generous two-inch cap of damp sand across the entire surface.
Throughout the cold months, the surface sand will dry out as water evaporates into the cellar room. Once every three or four weeks, run the back of your hand over the top sand. If it feels dry and dusty, spray the surface lightly with a clean hand mister to restore the surface humidity. Avoid pouring cups of water over the bin, which washes sand away and creates a stagnant pool at the bottom of the container.
Airflow and Temperature Rules for Alliums
Where roots crave burial, alliums demand light, air, and freedom of circulation. Before garlic and onions ever cross the threshold of the cellar, they must be fully cured. We pull our alliums in late summer and dry them for three to four weeks in a warm, shaded shed or under a porch roof where wind moves freely. You can tell an allium is ready for winter storage when the stem neck is shrunk tight, brown, and completely devoid of green sap when pressed between thumb and forefinger. The outer wrapper must rustle like parchment paper.
Never store thick-necked onions or any bulb whose stem remains spongy. These individuals will never cure properly and will rot from the inside out within sixty days. Set them aside for immediate use in the kitchen. For the keepers, trim the dead roots back to a quarter inch with pruning shears and clip the dried stalks two inches above the bulb, unless you intend to braid the stems.
In the cellar, we keep alliums suspended. Hanging mesh bags made of hemp or loose poly netting are our preferred choice, holding between five and ten pounds of bulbs per sack. Hanging them from ceiling joists exposes every side of the cluster to ambient air currents and keeps the bulbs away from rodents that might run along the floorboards. If you prefer wooden containers, use shallow crates made with wide slats that allow horizontal airflow across the bottoms of the boxes. Never pack alliums more than two layers deep in a crate.
The temperature range for alliums should hover between 34 and 38 degrees Fahrenheit. If temperatures drop below 30 degrees, the bulbs freeze, breaking cell walls and turning the flesh into clear, watery mush upon thawing. If temperatures climb above 45 degrees, the bulbs assume spring has arrived and push out green shoots, drawing sugars from the inner cloves and leaving behind bitter, rubbery scales. Keep a calibrated thermometer right at shelf level to track these variations.
The Role of Ethylene Gas in Premature Rot
One of the quietest destroyers of root cellars is ethylene gas. Ethylene is an odorless, naturally occurring plant hormone released in high volumes by ripening climacteric fruits, particularly apples, pears, and quinces. In the orchard, ethylene signals fruit to drop and sweeten. Inside an enclosed storage space, however, it serves as an unwelcome trigger for dormancy break and rapid cellular decay.
When exposed to ethylene gas, carrots synthesize isocoumarins, bitter chemical compounds that render the root woody and nearly inedible after a few weeks. In potatoes and beets, ethylene triggers premature sprouting of dormant eyes and accelerated root development. Onions respond to ethylene exposure by softening at the neck, opening the door for Botrytis neck rot to slide down between the inner rings.
If you put up orchard fruit alongside your winter garden roots, physical separation is mandatory. An apple bin cannot sit beside a carrot box. We recommend one of the following setups to manage gas buildup:
- Dedicated Fruit Rooms: Build a vapor-tight partition wall inside the cellar using exterior plywood or cement backer board, sealing the joints with silicone caulk. Vent this small fruit room independently to the outdoors through a dedicated PVC wall sleeve so the gas never enters the main vegetable bay.
- Venting and Baffling: If dividing the room is structurally impossible, place your apple crates at the highest point of the cellar directly beneath an exhaust vent pipe, because ethylene is slightly lighter than air at cellar temperatures and rises toward the ceiling. Keep root boxes and alliums at floor level on the opposite side of the room near the intake vent, ensuring fresh outdoor air washes over the vegetables before moving toward the fruit exhaust.
- Outbuilding Storage: When cellar volume is limited, the safest approach is to store apples and pears in an unheated porch cabinet, garage vestibule, or well house, reserving the true cold cellar exclusively for roots, brassicas, and alliums.
Inspecting the Bins for Soft Spots
The work of winter storage is not finished when the cellar door latches in November. A cold cellar is an active ecosystem, and decay is opportunistic. We make a habit of conducting a systematic cellar inspection every two weeks, bringing down a wooden tray, a clean cloth, and an inspection flashlight.
We always begin with our sense of smell. As soon as you step onto the cellar floor, pause and breathe through your nose. A healthy cellar smells like wet stone, moss, and cool soil. If you detect a sweet, sickly cider scent, an apple or turnip has broken down. A pungent, sulfurous odor indicates a decomposing onion, while a sharp ammonia scent points toward a rotting potato or celeriac. Track the smell to its source before touching the boxes.
When inspecting the sand-packed roots, slide your fingers down through the sand until you reach the root shoulders. Gently rock each root back and forth. It should feel firm, dense, and unyielding. If your thumb sinks into the flesh or detects a spongy, slimy spot, lift the root out immediately, taking care not to disturb the surrounding sand more than necessary. Dig out a handful of the sand immediately touching that decayed root, as it will be charged with fungal mycelium and bacteria, and discard it outside. Smooth the remaining sand back into place.
For alliums, lift each hanging mesh bag and cup your palm underneath, gently squeezing the bulbs through the netting. You do not need to pull every onion out of the sack. A good bulb feels like a solid wooden block. If you feel give or softness around the neck, untie the bag and pull that bulb out. Check the root plate at the base of the cloves for gray mold or powdery white residue. Any bulb showing soft tissue must be removed to the kitchen immediately or tossed into the compost pile if rot has pierced the inner scales.
Common Mistakes
- Washing roots before packing: Scrubbing vegetables removes their protective dermal microflora and introduces moisture into microscopic surface cracks, creating ideal conditions for bacterial soft rot (Pectobacterium carotovorum). Always dry-brush your roots.
- Using kiln-dried pine shavings: Some makers try packing roots in animal bedding shavings. Dry shavings pull natural moisture directly out of the roots, shriveling a crate of carrots within two weeks. If using wood shavings, they must be damp.
- Curing alliums in direct sunlight: Leaving harvested garlic or onions out in the sun causes sunscald, which literally cooks the outer rings, turning them translucent and rendering them vulnerable to secondary molds. Always cure alliums in airy, full shade.
- Ignoring temperature swings in late autumn: Early winter thaws can drive cellar temperatures up into the high 40s. Failing to open vents on cold nights and close them during warm days breaks root dormancy prematurely. Cellar keepers must actively manage passive wall vents until deep winter settles in.
- Storing bruised or mechanically damaged roots: A single fork tine puncture during harvest creates an entry highway for mold. Only pristine, undamaged roots belong in the long-term sand bins. Eat the scarred and cut roots first.
Practical Next Steps
Preparing a successful winter cold cellar begins weeks before harvest starts. Taking time now to square away the materials and environment will protect months of garden labor from spoiling under winter snows.
First, wash down your empty cellar shelves and masonry walls with a stiff brush and a mild solution of water and vinegar to knock down residual mold spores from the previous spring. Allow the space to air out completely while the days are still dry. If you have active earth floors, rake back any loose detritus and lay down clean wooden duckboards where you plan to walk, which keeps dirt from being kicked into your storage bins.
Second, gather your supplies. Source your builder sand early and store it under cover so it does not freeze into a solid block in the yard before your carrots are dug. Inspect your wooden crates for broken slats or protruding nails, and construct simple rough-sawn pine packing boxes if your stores are expanding. Mount an accurate thermometer and hygrometer at eye level on a central wall, well away from exterior vents or doorways, so you can establish a reliable baseline reading of your space before the harvest comes through the door.