In our workshop and kitchen, an enameled Dutch oven holds a steady presence on the hearth. We value these vessels because they merge the dense heat retention of cast iron with the non-reactive nature of glass. A heavy pot can simmer a venison stew for six hours or bake a loaf of sourdough at high heat without transferring metallic flavors into the food. Yet even the most attentive cook encounters the stubborn, blackened layer of scorched sugar, starch, and fat that adheres to the bottom after a simmer runs dry or a braise reduces too far.
When fond turns to carbon, our first instinct might be to reach for abrasive wire pads or heavy chemical sprays. In doing so, we risk ruining the very surface that makes enameled iron so durable. Restoring a scorched pot requires patience and a clear understanding of the chemistry between fired glass, iron, and burnt organic material. By working with mild alkaline solutions, controlled warmth, and softer mechanical tools, we can release the baked-on crust without dulling the gloss of the enamel glaze.
Understanding Vitrified Glass and Thermal Shock
To care for enameled cookware properly, we must look at how it is constructed. Manufacturers cast a thick iron core, clean the raw casting with steel grit, and then spray or dip it into a wet slurry of ground glass, clay, and mineral pigments known as frit. The piece enters an industrial furnace heated between 1400 and 1450 degrees Fahrenheit. At this temperature, the frit fuses into a smooth, non-porous layer of vitrified glass that mechanically bonds with the porous iron beneath. A quality Dutch oven usually receives two or three coats: a dark base ground coat to bite into the iron, followed by colored cover coats that form the finished interior and exterior surfaces.
Because glass and iron expand and contract at different rates when heated, the glaze formula is engineered to match the movement of the metal as closely as possible. However, the balance is delicate. Glass has high compressive strength, meaning it handles pressure well, but it has low tensile strength and fractures easily when pulled apart. If we heat or cool the vessel too quickly, the iron moves faster than the glass shell. The resulting tension leads to thermal shock, causing microscopic fissures called crazing, or worse, large flakes of glass popping off the iron core, an irreversible failure known as spalling.
Thermal shock occurs most often at the sink. Setting a hot pot directly from a 425-degree oven into a basin of cold rinse water creates an instant temperature drop of several hundred degrees. The iron contracts violently, while the glass layer resists, leading to spiderweb cracks across the floor of the vessel. We always allow an enameled pot to rest on a wooden board or trivet until it reaches room temperature before introducing any water, even warm water, to its surface.
The Gentle Simmer Method with Alkaline Salts
When dealing with a layer of carbonized protein or caramelized starch, forceful scraping often damages the pot before it frees the food. We rely instead on a low simmer using sodium bicarbonate, commonly known as baking soda. Baking soda is mildly alkaline, with a pH of roughly 8.3 when dissolved in water. This mild alkalinity helps saponify baked fats and loosen the ester bonds holding scorched proteins to the slick surface of the glaze, all without etching the silica network of the glass.
To use this method on a badly scorched interior, follow these practical measures:
- Cool the vessel: Verify that the pot has cooled completely to room temperature by placing your bare palm against the exterior base.
- Fill with water: Pour in enough lukewarm water to submerge the burnt residue by at least one inch. For an average five-quart Dutch oven, this usually requires between three and four cups of water.
- Add the alkaline salt: Stir in three tablespoons of sodium bicarbonate until mostly dissolved. If the scorched area covers the lower sidewalls as well, increase the water to six cups and add one-third cup of baking soda.
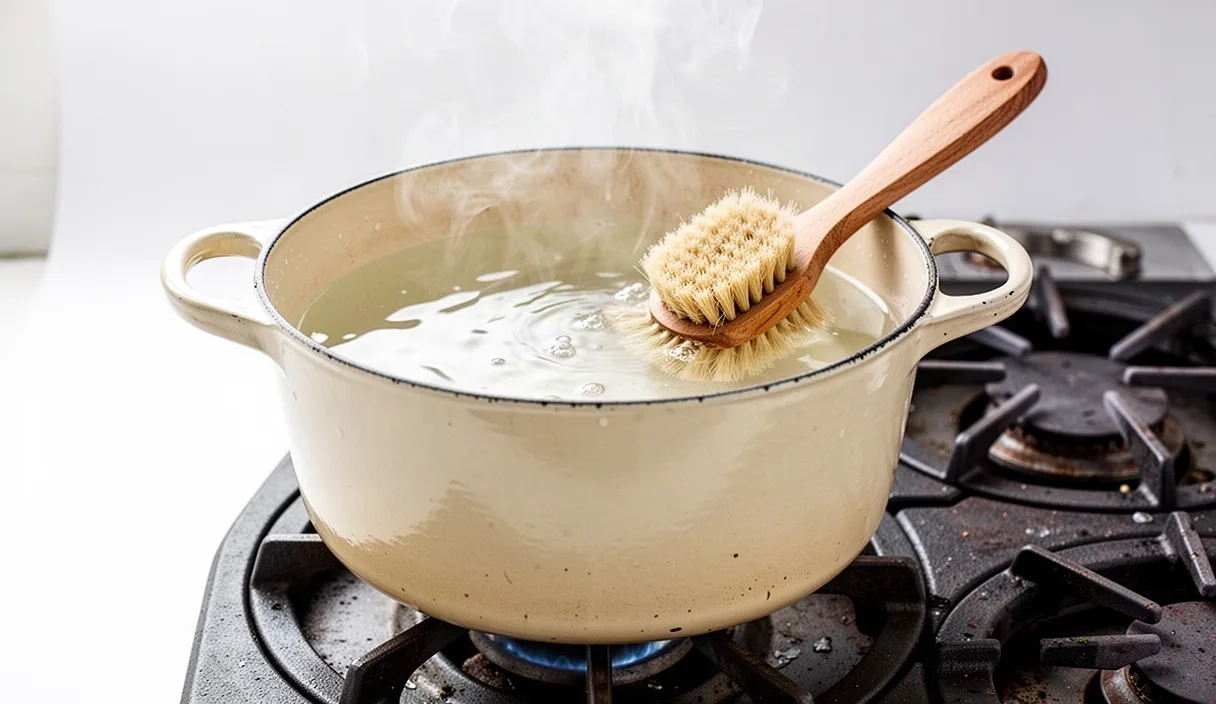
- Bring to a low simmer: Place the pot on a stove burner sized to fit the base. Over medium-low heat, slowly bring the liquid to a gentle simmer. Do not boil it violently; rapid bubbling can splash alkaline water onto the burner grates and bake onto the pot's exterior paint.
- Maintain the simmer: Allow the mixture to bubble softly for twelve to fifteen minutes. As the heat and alkali work, use a flat-edged wooden spatula to gently probe the scorched patch. You will feel the hard carbon soften into a loose, pliable paste that lifts off the glaze.
- Rest and cool: Turn off the heat and allow the water to cool until it is safe to touch, roughly thirty minutes. Pour the darkened liquid out and wipe away the remaining residue with a soft sponge.
For burnt residues that contain high amounts of sugar, such as fruit preserves or milk puddings, we occasionally add one tablespoon of liquid dish soap to the simmering solution. The surfactants in the soap lower the surface tension of the water, allowing the alkaline solution to penetrate the dense crystalline matrix of the burnt sugar much faster.
Soft Tools That Will Not Scratch the Glaze
The mineral hardness of enameled glass ranks around 5 to 6 on the Mohs hardness scale. Any cleaning tool that possesses a mineral hardness equal to or greater than 6 will cut microscopic grooves into the glass. While these fine scratches might not break the pot immediately, they permanently destroy the high-gloss fire polish. Over time, those grooves collect grease, turn brown, and cause future meals to stick relentlessly to the damaged floor.
Steel wool, green abrasive scouring pads made with silicon carbide or aluminum oxide, and metal spatulas must stay away from enameled surfaces. Silicon carbide has a Mohs hardness of 9 to 9.5, which easily cuts glass. Instead, we select materials that sit comfortably below 4 on the hardness scale. These softer tools yield against the glaze while remaining stiff enough to scrape through softened carbon.
| Tool Material | Mohs Hardness | Scratch Risk | Recommended Use |
|---|---|---|---|
| Beech or Maple Wooden Spatula | Under 2.5 | Zero risk | Scraping burnt layers during an alkaline simmer |
| Polymer Mesh Pad (White / Blue) | Roughly 2 to 3 | Low risk | Routine dishwashing and clearing loosened residue |
| Natural Loofah Sponge | Roughly 1.5 | Zero risk | General washing and clearing light sauce films |
| Copper Cleaning Cloth | Roughly 3.0 | Low to moderate risk | Spot cleaning stubborn spots without excessive pressure |
| Green Abrasive Pad (Aluminum Oxide) | Roughly 8.5 to 9 | High risk | Do not use on vitreous enamel |
| Stainless Steel Wire Wool | Roughly 5.5 to 6 | High risk | Do not use on vitreous enamel |
In our workshop, our preferred tool is a broad, flat-edged paddle carved from dry beech or maple. Wood yields slightly under pressure, conforming to the curve where the bottom of the pot meets the sidewall, known as the knuckle. By keeping the edge of the wooden tool square and sharp with a quick pass of a hand rasp, we can push clean lines through burnt matter without marking the glass enamel beneath.
Clearing Yellow Exterior Stains
While the inside of an enameled pot faces direct food scorching, the exterior often suffers from a different ailment: the slow accumulation of polymerized oil. When fat splatters from a nearby frying pan or runs down the exterior wall, the intense ambient heat of the oven or gas burner bakes that oil past its smoke point. It converts into a tough, golden-yellow or dark amber varnish similar to the seasoning on raw cast iron. Because this film forms on top of the bright exterior color, it makes the pot look dull, neglected, and dirty.
Polymerized grease resists standard dish soaps because it has cross-linked into a natural plastic. To strip this film without dulling the gloss of the exterior enamel, we use a wet paste made of equal parts hydrogen peroxide (three percent concentration from the chemist) and sodium bicarbonate. Peroxide works as an oxygen-based bleach, breaking the chemical bonds of the oxidized oils, while the baking soda acts as a mild mechanical carrier.
Applying the Peroxide Paste
Stir the three percent hydrogen peroxide into half a cup of baking soda until it forms a thick paste with the consistency of mortar. Lay the cool pot on its side over an old cotton towel to prevent the rim from bumping against the counter. Using a soft natural bristle brush or your fingers, smear the paste over the yellowed exterior areas to a thickness of roughly one-eighth of an inch.
Allow the paste to sit undisturbed for forty-five minutes. As the peroxide reacts, you may see small bubbles forming within the paste. After the resting period, dampen a cloth with warm water and rub the paste in circular motions. The yellowed varnish will lift off in flakes and smears onto the rag. Rinse the exterior with clean water and dry thoroughly. For spots that have been baked on repeatedly over several years, a second application may be required, or you may use a paste of water and a specialized non-abrasive mineral cleanser based on feldspar.
Storage Tips to Prevent Edge Chipping
Once your enameled pot is clean and dry, the greatest danger it faces is physical impact during storage. The most vulnerable section of any enameled vessel is the rim. On many pots, the extreme edge displays a thin, dark line where the iron was coated with only a single thin layer of ground frit, or left semi-exposed to allow clean release from casting molds. Because this edge forms a sharp ninety-degree profile, any direct blow from a hard object concentrates stress along a tiny surface area, causing the glass to chip away from the iron.
When glass chips along the rim, moisture penetrates underneath the adjacent enamel, leading to creeping rust that slowly loosens the neighboring glaze. To preserve the rim, avoid resting the cast iron lid directly on the bare pot without a buffer. The heavy cast iron lid can rattle and strike the lower rim as drawers open or shelves shift.
- Use plastic or silicone bumper clips: Keep the four small plastic clips that came with the pot in its original shipping box. Place these evenly around the rim before setting the lid inverted or upright into the pot. If those clips are lost, cut four one-inch pieces of silicone aquarium tubing lengthwise and slide them over the pot rim.
- Rely on heavy wool felt dividers: If you stack multiple enameled pans or lids, cut circles of thick industrial wool felt or heavyweight cotton canvas to place between the nested pieces. Do not allow metal bottoms to touch enamel interiors.
- Avoid hanging by handles: Enameled cast iron is exceptionally heavy. Hanging pots from an overhead rack by their side loop handles invites accidental collisions with hanging steel pans, which can easily crack exterior enamel coats.
- Store with airflow: Never seal an enameled Dutch oven tightly with its lid if there is any residual moisture inside. Trapped humidity causes rust to bloom along the dark rim seam. Invert the lid slightly off-center or leave the bumpers in place to allow air exchange.
Common Mistakes
Through our own mishaps and observations of others, we have identified several recurrent practices that permanently ruin fine enameled iron. Avoiding these errors is just as critical as knowing how to clean the pot correctly.
- Using lye-based heavy oven sprays: Commercial caustic oven cleaners contain concentrated sodium hydroxide. While lye dissolves burnt grease rapidly, it slowly attacks silica. Leaving oven cleaner on an enameled pot will permanently strip the mirror polish, leaving the enamel chalky, matte, and prone to severe sticking. If caustic cleaners are ever used on older pieces, a professional conservator or refinisher should be consulted to evaluate the risk to the specific glaze composition.
- Running an empty pot over high heat: Preheating an enameled pot on high heat with no oil or liquid inside causes rapid, uneven thermal expansion. The iron floor bows upward microscopically, putting the brittle glass under immense shear stress, which often results in circular crazing across the center of the pan floor.
- Using citrus-based acidic soaks for carbon: While vinegar and lemon juice work wonders on mineral scale and hard water deposits, they are counterproductive for burnt carbon and fat. Acids can dull delicate glazes over long contact times and do not break down polymerized grease as efficiently as alkaline salts.
- Knocking metal spoons against the rim: Tapping a heavy stainless steel cook's spoon against the edge of the pot to shake off sauce is the primary cause of small exterior chips along the rim. Keep a wooden spoon rest beside the hearth and tap your utensils there instead.
Next Steps
Now that your enameled cookware is free of scorched residue and its glaze remains unmarred, return the pot to your cooking rotation with a clear routine for ongoing maintenance. After each use, wash the interior with warm water, mild liquid soap, and a soft cloth as soon as the pan cools down naturally. Do not place the vessel in an automatic dishwasher; harsh powdered detergents and high-pressure spray arms carry abrasive particulates that will gradually abrade the exterior gloss over dozens of cycles.
Take time once or twice a year to inspect the rims and interiors of your cookware under bright light. Check for tiny stress cracks or rough spots where the iron meets the glass. If you spot light mineral haze or white cloudy stains from boiling hard water, swirl two tablespoons of warm plain white vinegar around the bottom for two minutes, rinse thoroughly, and dry with a lint-free cotton cloth. Treated with calm care and an understanding of its material makeup, a heavy enameled pot will easily serve three generations of makers at the table.