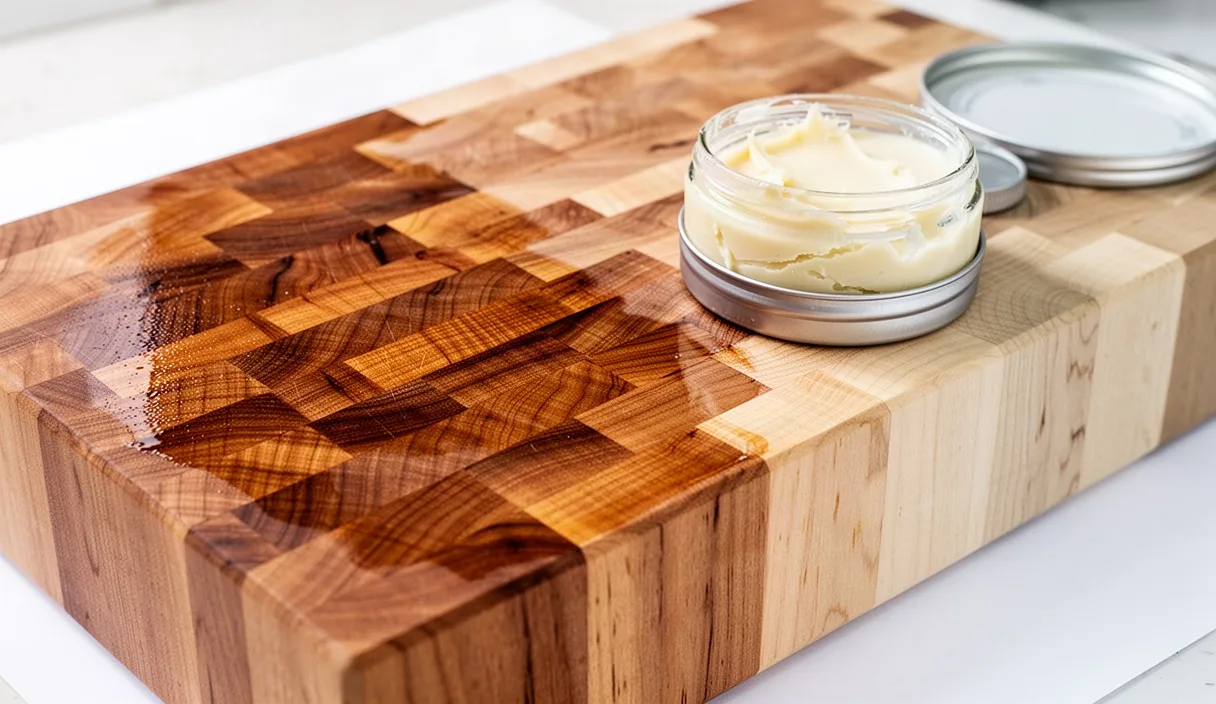
In our workshop, a well-used wooden cutting board tells the story of every meal prepared upon it. The dark scars from a french chef knife, the pale patches where lemon juice sat too long, and the dry, rough feel of scrubbed maple all mark the passage of time. Timber is an organic material that continuously breathes, expands, and shrinks in response to the moisture in our kitchens. When we wash a board with warm water and soap, we inevitably strip away the protective lipids and natural moisture that keep the cellular structure supple. Over months of steady use, the wood fibers dry out, shrink, and pull apart, leaving the surface dull, chalky, and vulnerable to deep liquid stains.
Restoring a parched cutting board is an intentional, tactile process that connects us directly to the craft of woodworking. By introducing a balanced mixture of mineral-safe oil and unrefined beeswax, we can replenish the lost moisture deep inside the xylem vessels and lock it in place with a durable external barrier. The oil penetrates the porous interior, while the wax solidifies on and near the surface, burnishing into a satin sheen that deflects cabbage juice, meat drippings, and wash water. Bringing a desiccated slab back to life requires patience, clean hands, and an understanding of how raw wood fibers drink.
Assessing Grain Thirst and Surface Cracking
Before we pick up a tin of finish or a scrap of sandpaper, we inspect the timber across its entire surface and end grain. A healthy board has a soft, glowing luster and feels smooth, almost cool to the touch. When wood becomes parched, the surface takes on an ashen or gray cast, particularly across the middle third where the knife strikes most often. If we run our fingertips across the dry zones, the grain will feel raised and prickly, resembling fine cardboard rather than planed hardwood. End-grain boards, built with the open pores facing straight up like a pack of straws, dry out faster than edge-grain or face-grain boards and demand closer scrutiny.
We check for three distinct stages of timber exhaustion:
- Surface chalkiness: The lightest stage, characterized by color loss and a dry texture, but without structural changes. A generous oiling resolves this quickly.
- Raised fibers and micro-fissures: Repeated water exposure has caused the grain to swell and collapse, leaving hairline splits under 0.5 millimeters wide. These require light mechanical smoothing before conditioning.
- Structural checks and glue-line failure: Deep splits wider than 1 millimeter running parallel to the grain, or separations along joint seams. In these cases, wax alone cannot bridge the gap; the board must be clamped and glued with food-safe PVA glue or assessed by a professional woodworker to ensure food debris cannot lodge deep inside.
To confirm whether the timber truly needs a full wax treatment, we perform a simple water test. We place three droplets of room-temperature tap water on the surface and wait for 180 seconds. On a properly sealed board, the water remains perched in round beads with high surface tension. If the droplets flatten and sink into the grain within two minutes, darkening the timber beneath them, the board is porous and needs deep saturation.
Sanitizing the Timber Surface Without Harsh Bleach
A board must be thoroughly cleaned and completely dry before wax can touch it. If we trap grease, food residue, or surface moisture beneath a layer of beeswax, we create a dark environment where bacteria and unpleasant odors can linger. Commercial chlorine bleach strips the timber of its natural lignins, weakens the cellulose bond, and leaves a persistent chemical smell that can taint food. Instead, we use mild, food-safe kitchen supplies that clean without damaging the fibers.
We begin by sprinkling coarse kosher salt or sea salt generously over the cutting surface. We slice a fresh lemon in half and use the cut side as a scouring block, working the salt across the wood in tight circular motions. The salt acts as a gentle, self-dissolving abrasive that lifts ground-in food particles, while the citric acid breaks down grease and neutralizes odors from garlic, fish, and onions. For stubborn, deep stains, we substitute sodium bicarbonate for the salt, making a thick paste with a splash of water and letting it rest on the affected zone for roughly 12 minutes before scrubbing.
Once scrubbed, we wipe the board down with a damp linen rag, rinse it quickly under warm running water, and immediately towel it dry. We never submerge a wooden board in a sink or leave it to rest in pooled water. After towel-drying, we stand the board on its edge on a wire cooling rack so that air circulates evenly across both faces. We allow the timber to dry for at least 24 hours in a well-ventilated room. Wax applied to damp timber will trap water, causing cloudy white blooms under the finish and inviting mold.
Formulating the Beeswax and Oil Blend
While plain liquid oil nourishes timber, it remains fluid and washes out after several cleaning cycles. Pure beeswax, on the other hand, is too hard at room temperature to penetrate into the grain. By melting beeswax into an oil carrier, we create a paste wax, often called board butter, that offers the penetration of an oil alongside the sealing properties of wax. We prefer food-grade mineral oil because it is chemically inert, odorless, and will never oxidize or turn rancid like vegetable oils, olive oils, or flaxseed oils can over time.
| Ingredients | Ratio by Weight | Texture | Best Use |
|---|---|---|---|
| Mineral Oil to Yellow Beeswax | 4 parts oil to 1 part wax | Soft paste, like room-temperature butter | General conditioning and regular maintenance |
| Mineral Oil to Yellow Beeswax | 3 parts oil to 1 part wax | Firm balm, requires finger warmth to melt | Heavy moisture barrier for end-grain butcher blocks |
| Mineral Oil to Carnauba and Beeswax | 6 parts oil to 1 part carnauba to 1 part beeswax | Dense, brittle paste | Hard-wearing surface polish for presentation boards |
To prepare the four-to-one mixture, we weigh out 400 grams of food-grade white mineral oil and 100 grams of clean, raw yellow beeswax pellets. We set a heat-safe glass bowl over a saucepan filled with two inches of simmering water, creating a gentle double boiler. We never melt beeswax directly over an open flame or high heat source, as wax vapors are flammable and overheat quickly above 85 degrees Celsius.
We place the wax pellets into the bowl and let them soften over the steam. Once the wax begins to liquefy, we slowly pour in the mineral oil, stirring continuously with an untreated wooden stick or silicone spatula. The cold oil will initially cause the wax to cloud and congeal, but persistent stirring over low heat will bring the entire mixture back to a clear, pale amber liquid. Once fully combined, we remove the bowl from the heat and pour the liquid into wide-mouth glass jars or metal tins. As it cools over roughly 90 minutes, the liquid sets into a uniform, creamy salve ready for the bench.
Applying the Deep Saturation Coat
With our board dry and clean, we prepare the surface for the paste. If the grain was raised during the cleaning process, we lightly stroke the wood along the direction of the grain with 320-grit silicon carbide sandpaper. We wipe away the fine dust with a dry cotton cloth. Sanding opens up the cell cavities and clears away the brittle, broken micro-fibers, ensuring an even reception for the paste.
We scoop out a walnut-sized dollop of the board butter using a clean cotton rag or our bare fingertips. The warmth of human hands helps soften the wax, allowing it to glide across the timber effortlessly. We rub the paste firmly into the wood using small, overlapping circles, deliberately forcing the mixture down into the open grain structure. We work our way methodically across the face, paying special attention to knife gouges, end-grain cuts, and the perimeter edges where timber dries fastest.
After coating the top, we flip the board and apply an equal amount to the reverse side and all four edges. Conditioning only one side of a dry board causes uneven moisture exchange between the top and bottom, which can pull the board into a cup or bow over time. When the entire board is thoroughly covered, the timber should look wet, glossy, and noticeably darker in tone, bringing out the rich character of walnut, the fiery reds of cherry, or the dense honey tones of rock maple.
Now, we let the board sit undisturbed. We allow the paste to dwell on the timber for at least eight hours, though letting it rest overnight for 12 hours is preferable. During this resting period, the mineral oil draws deep into the capillary network of the wood, carrying micro-particles of wax into the upper cells. As the carrier oil travels inward, the beeswax stays concentrated near the surface, slowly cooling and hardening as it binds with the raw wood fibers.
Buffing to a Water-Resistant Finish
After the dwell period, the board will look hazy and feel slightly waxy or sticky to the touch. This matte film is the excess wax that the wood could not absorb. Leaving this crust intact will result in a greasy board that clings to chopped herbs and attracts dust, so we must buff the surface until it is slick, hard, and clean.
We select a clean piece of unbleached cotton flannel, an old cotton canvas scrap, or a clean horsehair shoe brush. We avoid microfiber cloths, as their synthetic hooks can pluck wax out of the micro-pores instead of smoothing it over. Holding the cloth firmly in the palm, we begin wiping away the bulk of the excess wax across the grain, clearing the film from the surface.
Next, we switch to a fresh, clean fold of the cotton cloth to begin burnishing. We apply firm downward pressure and rub vigorously in the direction of the timber grain. The friction generated by this energetic rubbing creates localized heat, which softens the uppermost microscopic layer of beeswax, spreading it evenly and compressing it into a glassy, smooth sheet. We continue buffing until the rag glides without any drag or resistance. When we touch the wood with a clean finger, no greasy residue should transfer to our skin; the timber should feel silky, firm, and warm.
To confirm our work, we place a single droplet of water on the burnished surface. It should sit tall, clear, and perfectly bead-shaped, showing no inclination to flatten or wet the wood beneath. When we tilt the board, the droplet should slide right off without leaving a wet trail behind.
A Monthly Maintenance Schedule
Timber care is not a single project, but an ongoing cycle that honors the material. The frequency of maintenance depends on how often the kitchen sees work, how often the board is washed, and the ambient humidity of the season. Winter heating systems dry out home air dramatically, accelerating evaporation from kitchen tools, while humid summers slow it down.
- After each prep session: Scrape away food particles using a steel bench scraper held at a 45-degree angle. Wipe the surface clean with a cloth wrung out in warm, mild soapy water. Towel dry immediately and store the board upright on its edge. Never lay it flat on a wet countertop.
- Every four weeks: Perform the water bead test. If the water spreads out or soaks into the wood within two minutes, set aside an evening for a maintenance coat. Clean, dry, and apply a thin veil of the wax paste, letting it rest for two hours before a brisk buffing.
- Every six months: Inspect the board under raking light for knife furrows and uneven wear. If the surface shows heavy scoring where meat juices gather, use a flat sanding block with 220-grit paper to true the work area, then smooth with 320-grit, sanitize, and rebuild the saturation coat with two successive applications over 48 hours.
- Annually: Check the glue joints and flat plane of the slab against a reliable straightedge. If the board rocks on the counter, it may need to be planed flat, or have small silicone feet attached to the underside to stabilize it against minor seasonal movement.
Common Mistakes to Avoid
Through working with wood, we have encountered several well-intentioned practices that inadvertently ruin fine cutting boards. Avoiding these missteps preserves the structural integrity of your board for decades:
- Using vegetable or cooking oils: Olive, canola, corn, and sunflower oils contain unsaturated fats that oxidize over time, turning sticky and developing a sour, rancid smell that ruins the timber and contaminates food.
- Soaking in the sink: Immersing a board breaks down glue joints and forces excessive water into the wood cells, leading to severe warping, cupping, and splitting as it dries unevenly.
- Using pure liquid paraffin or motor oils: Only oils certified as food-grade mineral oil (USP standard) or pure fractionated coconut oil (MCT) should ever contact food-preparation surfaces.
- Overheating the wax: Boiling beeswax or applying direct flame darkens the wax, destroys its subtle honey aroma, and poses a serious fire hazard. Always use indirect heat via a double boiler.
- Dishwasher cleaning: The combination of sustained scalding water, aggressive caustic detergents, and forced-hot-air drying cycles will split and ruin any glued hardwood board in a single wash.
Moving Forward with Your Board
Restoring a dry cutting board is one of the most rewarding small tasks in a kitchen. It returns an essential tool to its prime working state while slowing down our pace and focusing our attention on the raw materials we rely on every day. Once you have made your first batch of board butter, store the sealed tin in a cool, dark cupboard alongside your bench scraper and sharpening stones. It will remain stable and ready to use for years.
Take an evening this week to inspect your kitchen boards. Feel the grain, test how water behaves on the surface, and mix a small batch of mineral oil and beeswax. With an hour of active care and an overnight rest, you will pull the rich colors back out of the timber, seal its cellular structure, and ensure that your boards remain dependable, beautiful work surfaces for countless meals to come. If you encounter deep cracks that split through the thickness of the board, set it aside from raw meat preparation until you can repair the joint with proper food-safe adhesive or consult an experienced cabinetmaker.