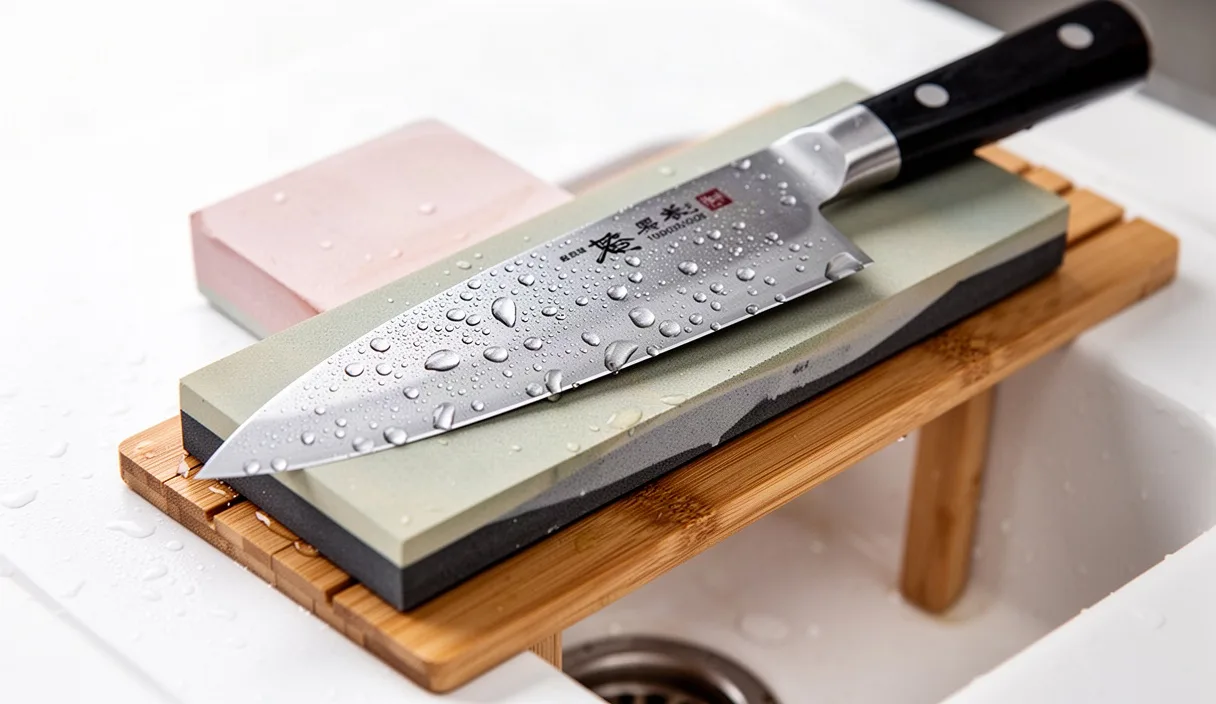
We keep our knives sharp not out of ritual obsession, but because a dull edge crushes plant cells, tears meat fibres, and skids unexpectedly off an onion skin. When we cut with a dull blade, we press down with brute force, inviting slips and jagged cuts. Sharpening on bench stones returns the apex to an exact geometry, refining the intersection where two polished bevels meet at a thickness thinner than a human hair.
Waterstones offer a degree of control that mechanical wheels and pull-through carbide sharpeners cannot match. By lubricating the abrasive block with plain tap water, we keep the friction low, carry away swarf, and prevent the steel from heating up enough to ruin its temper. It is quiet, deliberate work that requires little more than clean water, two abrasive stones, and a steady pair of hands resting on a stable surface.
Choosing Medium and Fine Grit Stones
We rarely need a massive battery of sharpening stones for regular kitchen maintenance. Unless we are repairing deep chips from a run-in with a poultry bone or thinning the primary bevel of an antique cleaver, our work relies on two core grades: a medium grit to establish the cutting apex and a fine grit to refine and polish it. Waterstones are graded on the Japanese Industrial Standard (JIS) particle scale, where the number corresponds to the physical mesh size through which the abrasive grains pass.
A medium stone in the range of 800 to 1200 grit does the physical cutting. This stone removes micro-chips and reshapes rolled edges without tearing deep furrows into the core steel. For softer German kitchen knives forged from steels like X50CrMoV15, a 1000 grit edge provides enough microscopic tooth to bite straight through slick tomato skins without sliding. For harder Japanese blades made from steels such as VG10, Shirogami, or Aogami, we follow the medium stone with a fine stone between 3000 and 6000 grit. This higher grit refines the scratches into a bright, mirror-like scratch pattern, allowing the edge to push through protein with minimal drag.
| Stone Grit | Primary Function | Abrasive Behaviour | Typical Steel Suitability |
|---|---|---|---|
| 800 to 1200 | Setting the bevel, repairing minor dullness | Cuts steel quickly, produces visible dark slurry | All kitchen knives, soft or hard alloys |
| 3000 to 4000 | Refining the edge, semi-mirror polish | Removes medium scratches, leaves crisp tooth | German utility knives, carbon steel slicers |
| 5000 to 6000 | Final apex polishing, push-cutting refinement | Very slow steel removal, hard glassy feel | High-carbon Japanese gyuto, santoku, nakiri |
We also distinguish between traditional soaking stones and splash-and-go ceramics. Traditional stones use a softer binder, usually clay or resin, which wears away under friction to constantly expose fresh, sharp mineral grains. Splash-and-go stones use a dense magnesium or vitrified binder that absorbs almost no water and resists dishing far longer, though they lack the pillowy, forgiving feedback of a traditional clay-bound whetstone.
Soaking and Flattening the Stones
Before steel touches mineral, we prepare the surface. Traditional soaking stones contain thousands of microscopic air pockets. If we use them dry or merely wet the surface, the water pulls deep into the stone instantly, leaving the surface dry and causing metal swarf to pack tightly into the pores, a condition called glazing. We place our medium stones in a basin of clean, cool water. Bubbles will rise steadily from the pores. When the stream of air stops, usually after 10 to 15 minutes, the stone is saturated and ready for the bench. Splash-and-go ceramic stones should never be submerged for long periods, as prolonged soaking softens their binders; they need only a direct spritz from a spray bottle.
A dished stone cannot sharpen a knife straight. Because our strokes concentrate naturally near the centre of the block, the middle wears away faster than the ends, creating a subtle valley. If we sharpen on a concave stone, our bevels become convex and the tip of the knife will refuse to touch the abrasive. We flatten our stones before every single sharpening session using a diamond lapping plate or a sheet of 180-grit wet-or-dry silicon carbide sandpaper laid over a dead-flat scrap of float glass or polished granite.
- Take a soft graphite pencil and draw a crosshatch pattern directly onto the wet face of the waterstone.
- Place the diamond plate or abrasive glass against the stone under running water or with a puddle of lubricant.
- Rub the two surfaces together in smooth, circular strokes, keeping even downward pressure across the whole block.
- Inspect the pencil marks every 20 seconds. The high corners will lose their pencil lines first. Continue lapping until the lines in the low centre have disappeared completely.
- Rinse the slurry thoroughly from the stone to prevent coarse flattening grit from contaminating your fine sharpening surface.
Set the flattened stone on a damp tea towel, a non-slip silicone mat, or an adjustable rubber stone holder clamped to a sturdy table. The stone must not shift or wiggle under hand pressure. If your workstation moves while you stroke the blade, your sharpening angle will drift with every pass.
Locking Wrist Angle and Finger Pressure
Sharpening freehand is an exercise in muscle memory, not mechanical precision rigs. The primary goal is to maintain a single bevel angle across the entire sweep of the stroke. Most Western chef knives perform best at an included angle of roughly 20 degrees per side, while Japanese kitchen knives, built from harder, more brittle alloys, are typically ground to 15 degrees per side.
To find 15 degrees without a protractor, stand the knife spine-down on the stone with the blade perfectly vertical (90 degrees). Tilt it halfway toward the stone to find 45 degrees. Tilt it halfway toward the stone once more to reach roughly 22 degrees, then lower it just a touch further. For practical reference, two common pennies stacked flat beneath the spine of a standard 50-millimetre tall chef knife yield approximately a 15-degree tilt. Once our hands register how that distance looks and feels, we remove the coins and lock our wrists.
Do not bend the wrist during the stroke. The wrists, elbows, and forearms form a rigid frame; the movement across the stone comes from the torso and hips rocking gently forward and backward. If your wrists hinge as you push, you will rock the blade, turning a crisp, flat cutting bevel into a round, blunt curve. Keep the dominant hand wrapped around the handle to control angle and rotation, while two or three fingertips of the non-dominant hand rest flat on the blade face, about 5 millimetres back from the cutting edge. These guide fingers apply the actual grinding pressure, which should never exceed the weight of a heavy coffee mug, roughly 1 to 2 kilograms of force.
Working the Heel, Belly, and Tip
A standard kitchen knife has three distinct sections along its edge: the straight heel, the curved belly, and the delicate tip. Because a flat stone cannot touch all three curves simultaneously, we break the edge into imaginary sections, overlapping each zone as we sharpen. We place the blade diagonally across the stone, roughly 45 degrees to the stone length, which widens the contact patch and smooths out the stroke.
Begin at the heel. With light, continuous pressure from your non-dominant fingertips, push the edge forward across the stone, then pull it back along the exact same track. We prefer working back and forth in smooth, controlled scrubbing strokes of roughly 50 to 80 millimetres, moving slowly down the length of the edge as steel is abraded. As the stone breaks down, a dark paste of abrasive particles and micro-shavings of steel will collect on the surface. Do not rinse this mud away; this slurry is what refines the edge. Add drops of clean water only when the surface feels sticky or dry.
As you shift your guide fingers forward onto the belly, the blade profile begins to curve upward. To keep the edge bevel flat against the stone, lift your dominant elbow and wrist upward by a few millimetres. Think of raising the knife handle to follow the contour of the edge. If you leave the handle level, the stone will skip the curved belly entirely and gouge into the spine. At the very tip, raise the handle slightly higher and reduce your finger pressure by half. The tip has very little surface area supporting the load; heavy pressure will rapidly abrade the point into a blunt, misshapen nub.
Detecting and Removing the Wire Burr
We do not count strokes when we sharpen. Counting strokes assumes both sides of the blade have identical wear, which is never the case. Instead, we grind the first side until we raise a continuous wire burr from the heel all the way to the tip. A burr forms when the abrasive stone grinds steel away from the bevel until it meets the opposite bevel at a microscopic edge, folding a tiny, paper-thin lip of bent metal over the other side.
To feel the burr, wipe the blade dry on a cloth. Place the fleshy pad of your thumb flat against the side of the blade that was facing upward, away from the stone, and gently sweep your thumb outward, off the cutting edge. Never slide your thumb along the length of the edge. If steel has been sufficiently removed, you will feel a rough, raspy catch, like a strip of dry sandpaper or the rough underside of an unglazed ceramic plate. If any section of the blade feels smooth and slick, return the knife to the stone and work that specific sector until the burr is present along the entire length.
Once the burr is continuous, flip the knife over and repeat the exact same grinding process on the opposite side. Because the bevel angle is already set, this second side will raise an opposing burr much faster. When the second burr is formed, do not jump directly to a finer stone. You must strip the burr away on your current grit first, or you will merely fold weak, fatigued metal back and forth until it snaps off in your food, leaving a ragged hole in the edge.
- Reduce your downward finger pressure until the knife travels under only its own physical weight.
- Switch from back-and-forth scrubbing to alternating, single edge-trailing strokes: pull the edge from heel to tip as if slicing a paper-thin sheet off the stone face.
- Make 4 single passes on one side, flip, make 4 passes on the other side.
- Repeat for 3 passes, then 2 passes, then a final, feather-light stroke on each face.
- Rinse the blade and stone thoroughly before moving to your fine finishing stone, repeating the light deburring cycle on the higher grit.
Stropping on Clean Leather
The stone work is finished when the scratch pattern is uniform and the wire burr is almost entirely detached. However, microscopic foil edges often remain clinging to the apex. Stropping removes these final micro-teeth and aligns the metal crystals without abrading away valuable blade life. We prefer a strip of firm, vegetable-tanned cowhide mounted flat to a hardwood base, such as maple or walnut.
A clean, bare leather strop works best for kitchen tools. Many woodworkers use stropping paste loaded with chromium oxide or diamond suspensions, but for everyday culinary blades, plain smooth leather provides just the right amount of natural silicate friction without rounding over the crisp edge we just ground. Place the strop flat on your bench, smooth grain-side facing up.
Lay the knife flat on the leather near the end closest to you, then tilt the spine up until the factory bevel touches the hide. Draw the blade backward, spine-first, pulling from heel to tip along the length of the leather. Never push the cutting edge forward into leather; the edge will bite into the skin, ruin the strop, and blunt the apex instantly. Use long, fluid passes with almost no downward force, letting the natural friction of the leather sweep off the remaining micro-burr. Six to eight edge-trailing strokes per side are plenty. When complete, the blade should cleanly sever a sheet of soft newsprint or slice through a ripe plum without bruising the flesh underneath.
Common Mistakes to Avoid
Most sharpening problems come from rushing or shifting body mechanics. When an edge refuses to take a clean apex, look for these frequent errors:
- Sharpening on a hollowed stone: If you skip flattening, the curved surface will contact only the shoulder of the bevel and the edge near the tip, leaving the middle of your blade completely dull.
- Rinsing away the mud: Beginners often scrub their stones clean under running taps every minute. Washing away the slurry slows your work, as those loose abrasive particles do a massive amount of the fine grinding.
- Inconsistent angle changes: If your wrist relaxes and bends mid-stroke, you change your angle from 15 degrees to 25 degrees on the fly. This rounds the edge over, requiring you to start the bevel all over again.
- Flipping the knife before the burr appears: Switching sides based on a stroke count rather than a tactile burr leaves unsharpened dead zones along the belly. Verify the burr with your fingers before turning the blade over.
- Excessive muscle tension: White knuckles lead to uneven grinding and hand fatigue. Grip the knife handle with the firmness of a handshake, keeping your shoulders dropped and your wrists steady.
If you encounter a knife that has warped along its spine, or a blade with deep chips extending 2 millimetres or more into the primary grind, do not attempt to grind it away on medium waterstones. Removing that volume of steel by hand takes hours and destroys stone flat surfaces quickly. In such cases, consult an experienced professional sharpener with a water-cooled low-speed grinding wheel to reset the primary geometry before returning to your bench stones.
Next Steps for Your Bench
Sharpening is not an emergency repair; it is part of the kitchen rhythm. After every session, wash your stones clean of metal swarf with warm water, never using dish soap or household detergents, which can foul the porous ceramic bonds. Stand the stones on their long edges in a dish rack or on a dry slatted shelf out of direct sunlight. Never put soaking stones back into plastic storage cases while damp; stagnant water encourages mould growth and can cause soft clay binders to dissolve over months of storage.
Take one knife, preferably a simple carbon steel or plain stainless utility knife, and commit to working through this single sequence. Flatten your stone, set a steady posture, draw out the burr methodically on both sides, and sweep the clean steel over dry leather. When the blade parts a fresh tomato with only horizontal drawing motion and zero downward pressure, you will know the steel has found its true edge.